
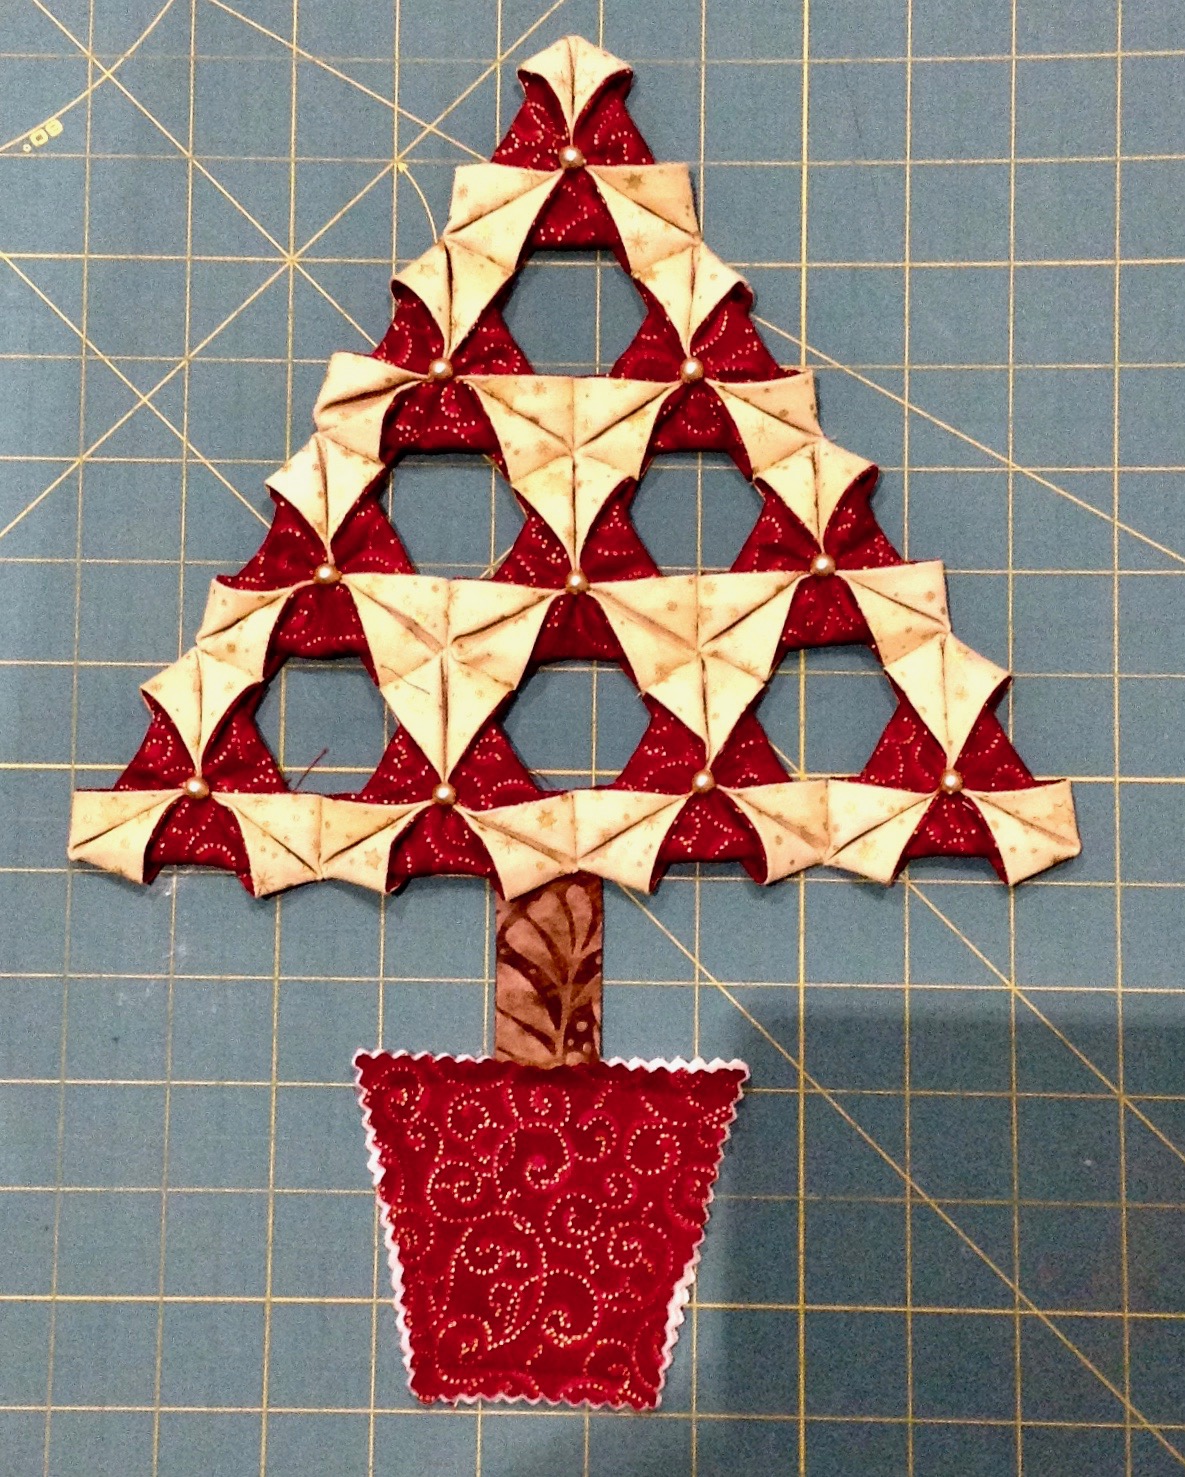
What do you think of my tree, like it? It isn't my pattern, just one that was being passed around years ago. I did a search for it and found a few including a You Tube video but I couldn't find where it had come from originally.

It takes just two contrasting five inch strips of width of fabric, you won't need the whole strip, but you can get two trees by turning the ruler or template, apart from that you just need a scrap for the trunk, two small pieces for the pot and a 4 inch square of wadding. There again you don't have to use Christmas fabric, and it would look great scrappy. Although I do like the effect between the two fabrics with high contrast by using two less contrasting fabrics any imperfections wouldn't be so noticeable, hmmmmmmmmmm! On the other hand, I do recommend the principle of 'blind men and galloping horses'.
Here's how I made it.
First I cut my triangles, I ironed the two strips if fabric right sides together and used my equilateral triangle, the 60 degree kind where all the sides are the same length. If you haven't got one you can easily make a template.

Draw a rectangle 6 inches wide by 5 1/4 inches high(I used a square ruler so I could make sure my corners were straight, or the end of a 24 inch ruler works too). Measure the centre point at the top (which is 3 inches) and draw lines from the point to each bottom corner to make the triangle.
Now draw a line 1/4inch from the line which gets rid of the top point, now cut it out roughly, glue it on a piece of card and cut out on the line, or whatever other way you use to make a template, but you get the gist, yes?

Now using your ruler or template cut out 10 pairs of triangles from your layered fabric, or 20 if you have decided to make two. When you use a ruler like mine which still has the top point on place the 5 1/4 inch line on the bottom and miss the point off.

You will need to cut off the first piece, then as you go turn your ruler 180 degrees for each cut to make the most economical use of the fabric.

Using a 1/4 inch seam machine around the three edges, leaving a gap of about 2 inches or what you feel comfortable with for turning. Before you turn remember to trim those points.

Roll the edges, push out the points as best you can and press, stitch up your gap with a slip stitch or ladder stitch.
Now it's the Origami part.

Take your top point, fold it to each of the bottom corners and finger press to find the centre point, then fold one of your corners in to the centre.

Bring a threaded needle up from the back and stitch through all the layers to secure. Do this with each of the three points so it becomes more of a hexagon shape, don't cut off the thread, push your needle through to the reverse.

Turning it over, find the centre of the seamed edge (not the fold), fold it down to the centre and secure it there, do this with each of the three sides. You may want to stop and tweak the shapes at this point (this is the bit I always forget to do). This is your front, if you want you can stitch a bead or a sequin to the centre now, or leave it until the end.


Lay out your shapes in a pyramid and stitch them together at the folded edges from the back using a slip stitch or ladder stitch.

Now stop for a minute and admire what you just did, looking lovely isn't it?

Now for the trunk, from a scrap of fabric cut two pieces about 1 1/2 x 2 1/2 drawing a line from the 1/2 inch mark to the top centre like this . The width and length isn't crucial, you may want it to be fatter or thinner, longer or shorter. Stitch up the sides and the top, trim, turn and press. Just leave the bottom edge raw. Only thing is I forgot to take any pics at this point.............

Now make the pot. Draw a rectangle 3 3/4 inches wide by 3 1/4 inches deep, again the size is up to you, measure about 3/4 inch from each bottom point and draw a line up to the top corners to make your pot shape. Use the template to cut out two pots from your pot fabric, and one piece of wadding. Layer the two squares of fabric wrong sides together with a piece of wadding between,pin together, and cut around the edge with pinking shears.
Yes I got carried away and forgot all about the pics again so you will just have to imagine.

Now you can see the trunk and the pot. Position the raw edge of the trunk inside the pot, centering it, and machine stitch 1/4 inch all around the edge. Can you spot the mistake? Yes, I added my trunk to the bottom of the pot and had to redo it. The second time I changed to my walking foot which I should have done in the first place, it was so much easier to stitch. Only thing is I remembered to take the pic which is when I spotted the mistake, then forgot to take a pic the second time, this is becoming a habit. Not one of my better days :-(
Pin and stitch your trunk to the tree using a slip stitch or ladder stitch as before.
Finally attach a ring or a loop of ribbon to the back for hanging, and enjoy.

This is the first one I ever made, about 8 years ago. I didn't have any pinking shears so I just machined around leaving a gap at the bottom to turn it through. What I should have done was make the pot 1/4 inch bigger all round but I never thought.
Before I leave you I am beside myself with the news I have had today and just HAVE to share it, even though it isn't quilting related.

My husband's book has just gone to print and we have a preliminary publishing date of 27th January 2017, AND it is on Amazon UK (and China) and on other bookstores including in Japan. Happy, happy, happy, I'm singing and dancing!!!
Until next time
Laughing my head off
With smiles from
Kate x
Linking up with Lorna @ Let's Bee Social, Kelly @ Needle'n' Thread Thursday, Sarah @ Can I Get a Whoop Whoop?, Amanda Jean @ Crazy Mom Quilts, and Myra @ Finished or not Friday, Cooking up Quilts, Monday Making, and Em's Scrap Bag
What a wonderful project the tree is and congrats to your husband! :)
ReplyDeleteFirst of all, congratulations on going to print ! Such a huge accomplishment! I wish you the best of luck, Gary! Secondly, what an interesting project. Your tree looks quite beautiful and will add just the right festive touch to your decor! XO
ReplyDeleteI am thrilled to hear about your husband's book. I know so much hard work and concentrated effort went into this. Congratulations to both of you!!
ReplyDeleteThis Christmas tree project is so adorable. Really unique. I have never seen anything like it. Very nice and so festive.
Great news on the book front for your husband . Great tree project too but I know that would never hang straight if I made it. Would do my head in. - not good for my state of mindfulness
ReplyDeleteVery interesting tree, I have never seen it before. Congrats to your DH on the book, exciting!
ReplyDeleteI wonderful news about your husbands book. I'll look out for it. I'm sure it will make it here eventually. You wrote a great tutorial for the tree and the result is really nice.
ReplyDeleteSuch delicate handiwork!!! What an adorable little tree. I am amazed at the labor of love that went into this. Oh now I see what happened to the red fabric that was in your studio in the previous post.
ReplyDeleteI love your little Christmas trees, Kate. Combining fabric and origami has to equal a good time. And a huge congrats on your husband's book release! That's pretty darn exciting news. I am sure you are very very proud of him.
ReplyDeleteSuch a gorgoeus Xmas tree, very festive!
ReplyDeleteYay! A finish for both of you!! Tell Gary congrats! That is a really cute and unique tree, Kate. I don['t think I've ever seen an origami tree before. You always come up with the most unique ideas.
ReplyDeleteThis is so cute! Thank you so much for the tutorial.
ReplyDeleteGreat news about your husband's book - congratulations! This is a good tutorial, Kate. It's a very effective little design!
ReplyDeleteWow. This is beautiful. You did a great job. Congrats on the new book.
ReplyDeleteI've never seen a tree like that before Kate - thanks for the tutorial! And congrats to your hubby. That is definitely crush-worthy news! :) Thanks for linking to MCM.
ReplyDeleteI love your tree! Thank you for providing a easy to follow tutorial! I've pinned it to my Quilting Christmas board as well as a group Christmas board! I'm glad I found you on MCM!
ReplyDeleteThat is so neat! Thanks for sharing how you did it.
ReplyDeleteCongrats to your husband and thanks for the wonderful tutorial!
ReplyDeleteGosh, well done to hubbie. You must both be soooooo excited!
ReplyDeleteWhat a great tutorial, Kate, and it's a very pretty tree!
Hugs,
Barbara xx
What a cute little origami tree. Congrats on the pending book for hubby too.
ReplyDeleteHi. One of my readers sent me a link to your Christmas Tree. I hope you don't mind, but I've put it on my blog, so you might be getting some more viewings. Nice blog by the way.
ReplyDeletehttp://meanqueen-lifeaftermoney.blogspot.co.uk/2016/11/crafting-inspiration.html
Congrats to your Guy on the book being published! Very cool. As are those Christmas trees. Very pretty.
ReplyDeleteKate, what a great tutorial! The tree is fabulous! Great news on Gary's book!
ReplyDeleteKate, the tree is gorgeous! Can't say I've seen anything like it before. And such good news about the book. It's always a thrill when a book finally gets published--it takes such work to get it to that point. So thrilled for you!
ReplyDelete