I’m going away for the weekend (tell you more later) and needed a thread catcher, this is what I made.

Like it? I made it from scraps, the blue fabric with the flowers and insects is one of the first fabrics I ever bought in 2001. I love those buttons.

It was quilted with concentric circles.

But I’m going with my friend Jan and she hasn’t got time to make one……………

Number 2, again made from scraps, this one with fabric given to me by Jan, so her choices really. This is how I made this one.

I layered two 12 inch squares, right sides together, on a piece of wadding and stitched around the edges with a 1/4 inch seam leaving a 3-4 inch gap for turning.

I like to make my gap generous so it’s easier to turn but before I did I trimmed the edges level and snipped the corners.

After stitching closed the gap and pressing flat I was ready for the quilting. I did this one with a 1/2 inch grid, nothing fancy, just up and down, side to side. But I forgot to take a pic, sorry.

All I did to stitch it together was to fold each side in half and measure 2 1/2 inches up and across from fold, mark and stitch.

Here it is now. When it is made up the quilting appears on the diagonal.

Flatten those corner pockets and stitch them down, you can turn it either way if you would prefer pockets on the outside. Turn down the points and secure with a button.


Easy, and quick to make, but remember that 1/2 inch grid? Well it was about 23 lines up and another 23 lines across, 46 starts and 46 stops, 92 in total and each having a top and a bottom thread, 184 threads to bury. I do them all individually and it took well over 2 hours, so you may want to quilt it differently. Looks good though.
There is a tutorial at Seaside Stitches, at Freemotion By The River, Connie makes hers slightly differently. Someone at a class I attended last year had one and told me how to make it. It seems to be one of those patterns that get passed around, no one knows where they come from or who made the first one and they vary slightly, mine has pockets which can be on the inside or the outside.
There is a tutorial at Seaside Stitches, at Freemotion By The River, Connie makes hers slightly differently. Someone at a class I attended last year had one and told me how to make it. It seems to be one of those patterns that get passed around, no one knows where they come from or who made the first one and they vary slightly, mine has pockets which can be on the inside or the outside.
I won’t be around from Friday lunchtime, I am going to Higham Hall in the beautiful Lake District in North-west England. Built in around 1800 it was a stately home and later on a youth hostle, then a girls residential school. It has been an adult residential college for over 30 years and does all different kinds of courses from history to jazz. This weekend I am doing embroidery. I have been here several times, I will continuing my ongoing project.

I made a cover which goes around the sides to stop it getting dirty from my hands, it leaves the back uncovered too.
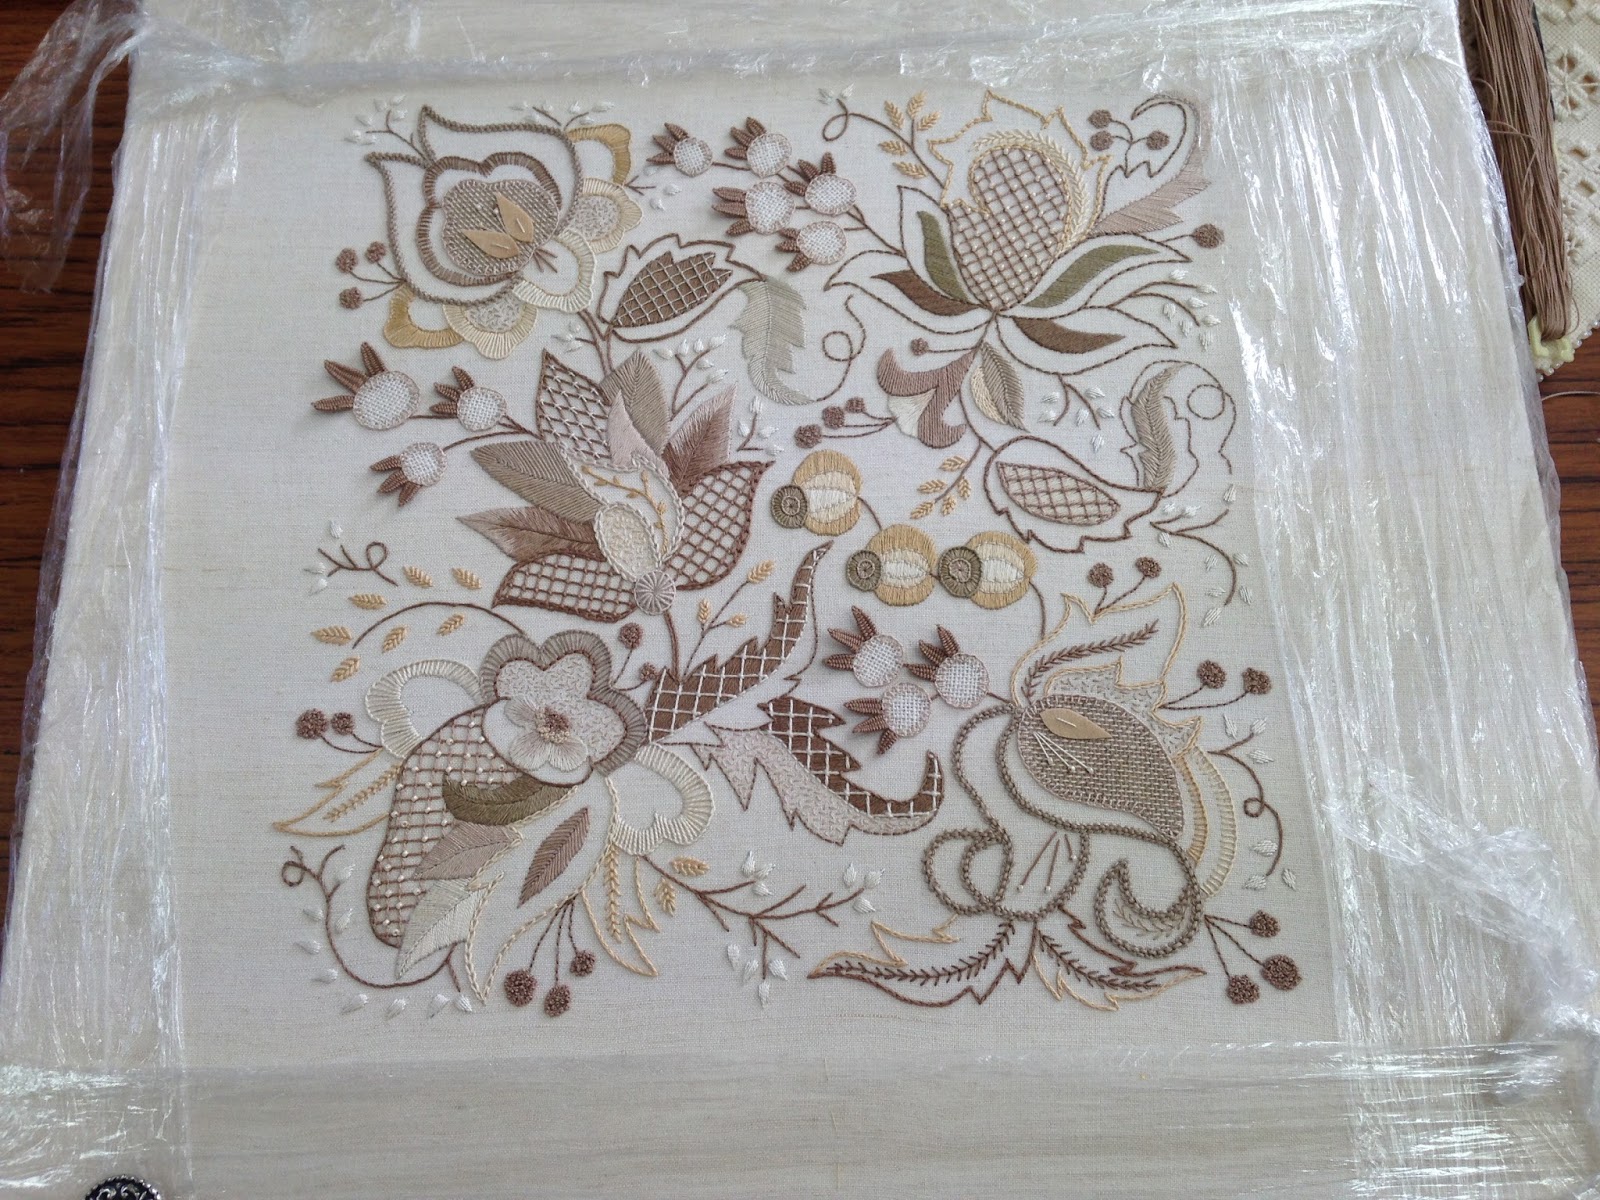
This is the pic I took of my teachers, she had just finished it. It speaks for itself.

Closer details.

This is by a classmate.
I am so looking forward to a great weekend. I hope you enjoy yours, whatever you will be doing.
Linking up with Freemotion by the River, Let's Bee Social, and Confessions of a Fabric Addict, My Quilt Infatuation Quilting is more fun than Housework (TGIFF) Can I Get A Whoop Whoop? , Crazy Mom Quilts
Until next time
Smiles from
Kate
It's sounds like you will be having a lovely weekend. Exquisite embroidery!
ReplyDeleteI have been working on (struggling with) a few ways to make fabric baskets. Sometimes the handles are too flimsy, sometimes the basket is not stiff enough and sometimes the lining and the basket measurements did not match. UGH!!!
ReplyDeleteNow, I have to try your method. And I cannot say anything about the embroidery because my mouths still open and I am speechless :-)
Hugs,
Preeti.
http://sewpreetiquilts.blogspot.com
I have made those baskets too, they are so fun and cute! Love the embroidery, just gorgeous!
ReplyDeleteLove your thread catcher. Great idea to use the folded corners as little pickets!
ReplyDeleteNice looking thread catchers! Your grid quilting is perfect with very straight lines. The crewel work is beautiful!
ReplyDeleteBeautiful work. And I like the thread catcher. Thaks
ReplyDeleteLove the thread catcher, thanks for the tutorial. I'll be making one or two of those...from scraps of course.
ReplyDeleteReally neat thread catchers Kate, have a wonderful weekend working on that lovely embroidery.
ReplyDeleteI don't love it when a '10 minute' project, takes two hours!!! But your thread catchers were worth it. I'm so envious of you going to the Lakes for a few days; if I had to live anywhere outside Cornwall it would be there :)
ReplyDeleteWhat a fun and clever way to make a thread catcher! Thanks you for sharing! That embroidery is stunning!
ReplyDeleteGreat thread catcher tutorial. Thank you! Enjoy your weekend of stitching. Your embroidery is beautiful.
ReplyDeleteYour threadcatcher baskets are adorable! I love how you are using those corner parts for pockets to hold things. Great idea! Enjoy your embroidery class this weekend!
ReplyDeleteLove your little thread catchers. Thanks for sharing with TGIFF!
ReplyDeleteYour baskets are so cute and thanks so much for sharing a link to my baskets!! Aren't they fun to make!! Your embroidery is beautiful and what a great idea to make the cover to keep the sides clean!
ReplyDeleteYour embroidery is beautiful. Have a fun weekend!
ReplyDeleteThank you so much for the great tutorial on the adorable thread catcher, or candy dish, or button box...endless uses. The needle work sampler is fabulous...I should so aspire to such fine work.
ReplyDeleteThat's a lotta' accomplishments! And a cute thread catcher! Thanks for the tute.
ReplyDeleteLove the thread catcher, thank you for the tutorial. The embroidery is beautiful, clever making the protector.
ReplyDelete