
????? Did you guess from the pic I showed last week?
Want another look?

I first saw these several years ago when I made one in a class, I was told it was a Victorian Thimble Case. I have since seen them called so many different names, a coin purse, thimble case, thimble holder, thimble pip, clam shell and brazil nut! My original case was made of cardboard and was a single layer with an inner and outer skin of fabric, no wadding. It did work but only lasted so long, maybe I'm a bit heavy handed opening and closing it. You just squeeze the two ends and when you let go it closes again, clever.
Looking through my box for handwork to take with me on holiday I came across a clamshell kit with templates and instructions, this one had two layers of plastic and instructions very similar to the old one, which I a assuming was how victorian ladies made cases for their thimbles. But, me being a bit thrifty I got out a sheet of template plastic and drew around the pieces, why make just one when you can use it as a template and it makes a nice little gift? So I took it on holiday with some fabric and wadding and made........

five. Well it did rain a lot.
They are a nice little project and very easy to make,

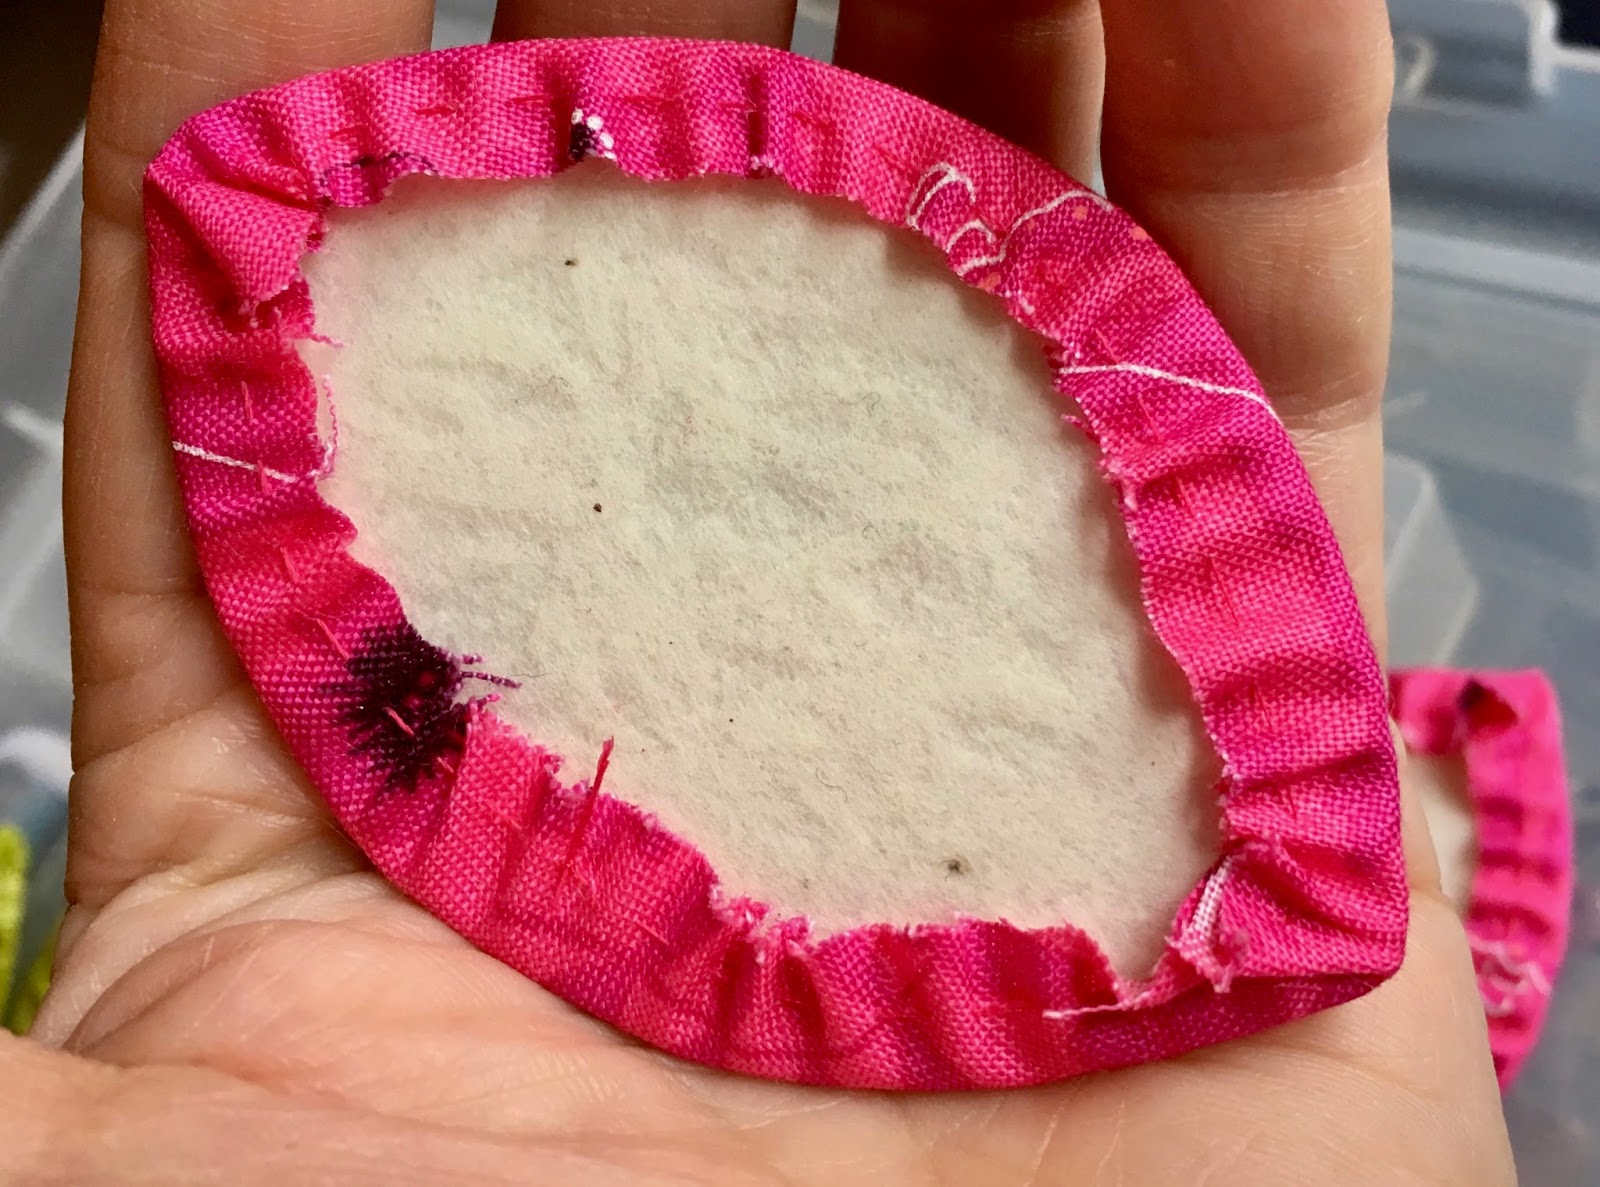
First I took my templates and glued them to a piece of scrap wadding, there are six pieces, three larger and three smaller for the inside.

When the glue dries just cut around the shapes, you can see here they are slightly different sizes.
I laid the pieces on to a piece of fabric and cut around leaving a good 1/4 inch seam allowance. Then I stitched around taking a big stitch at the pointed ends and drew up the threads just like you do with a circle and tied it off.

Then I laced across the back, I thought it was a waste of time doing this bit, until I didn't do it, it keeps it nice and taught and just the running stitch around the edge didn't do that.

Finished. You do this with the three large pieces and the three smaller pieces for the inside.

Then you line up a big outer piece with a smaller inner piece,

and ladder stitch them together leaving a margin around the outsides. Binding clips or something similar are the best thing to hold them while you stitch.

Then it's just stitching the three pieces together using a small overstitch in matching thread. The hardest bit is adding the third piece while it tries to spring apart, but it's ok once you get going.

You need to stitch up the remaining sides about 1/4 to 1/2 an inch and you are done. How is that for a nice little hand project?
Did you notice I made the insides with bright contrasting colours?

Except for this one, Husband asked me to make him one and chose his own colours, apparently I got them mixed up and the greyish colour was supposed to be on the outside, although I think it looks more interesting the way I made it. He hasn't decided what to do with it yet.

I wanted to make one for my silver thimble, it was a gift from a friend and I'm very attached to it. I have small fingers and this is perfect for me, only thing is I keep loosing it so I really needed the case.
Would you like to make a thimble case? You don't need to buy a commercial kit, or even template plastic, since I made mine I found a great tutorial AND there are free templates too, so just pop over to supermomnocape for the tutorial, she shows you how to make your own templates or you can always download her free templates. in three different sizes, the large one is the same size as mine although mine is the small size in the commercial kit, if you want a bigger set you can always just enlarge the template when printing it. Why don't you need template plastic? Because you can use plastic from margarine tops and bottles which will work just as well. If you are not a quilter and don't have wadding you could maybe use a piece of thin felt instead.
I was going to show you some other stuff but I think I've bored you enough for today so I'll just show you this weeks Gypsy blocks.

Puss on the corner, as you can see one is bordered the other not.
You may have noticed I have turned on comment moderation recently and last week added a bit under where comments are left saying anonymous comments will not be published. I have been having a lot of spam recently and some unwelcome comments too. I'm not so keen on the word and tick the box thing and this is easier. I hope you will understand.
You may have noticed I have turned on comment moderation recently and last week added a bit under where comments are left saying anonymous comments will not be published. I have been having a lot of spam recently and some unwelcome comments too. I'm not so keen on the word and tick the box thing and this is easier. I hope you will understand.
I made a bee block yesterday, I used some of my Gypsy fabric and LOVED the colour combination, I'll show you next week and you never know, I may even have an update on circles too.
EDIT I write this post last week but the curse of family illness struck, quilting and blogging were the last thing on my mind. With three elderly parents all with health issues chances are it may well happen again, so if I don't respond to your comments or visit your blog that's what it's likely to be so please forgive me and I will be back soon as I can.
EDIT I write this post last week but the curse of family illness struck, quilting and blogging were the last thing on my mind. With three elderly parents all with health issues chances are it may well happen again, so if I don't respond to your comments or visit your blog that's what it's likely to be so please forgive me and I will be back soon as I can.
Until next time,
With smiles from,
Hi. I love this...I'm going to try it and cannot wait to see if mine tipurnas out as adorable as yours did.
ReplyDeleteHow do you turn on comment moderation? I love the gypsy blocks and the thimble thingies. I hope things are o.k. with the family.
ReplyDeleteI have never seen the little thimble holder, I think it would hold earrings really well too or just how secure is it?
ReplyDeleteThose little cases are adorable! I love the colors you chose. Hope things are doing okay with your family now.
ReplyDeleteCute project! Thanks for the explanation. Hope all is better with your loved ones.
ReplyDeleteSupermom does have some terrific tutorials and tips doesn't she? I'll have to go check this one out as I love it! Thanks for the detailed photos. The first one is done with probably my favourite (and I'm not really an orange person) Kaffe fabric!! As always your GW blocks are stupendous!
ReplyDeleteI hope all is well with your family and no need to ever apologize about putting family first. Your little thimble holders are quite amazing! I was intrigued by how they work and how they were constructed!!
ReplyDeleteI like the little thimble holder! I will definitely give this a try.
ReplyDeleteThose are darling! And what a cute little gift that uses up smaller bits of fabric.
ReplyDeleteYour thimble pips/cases turned out really pretty.
ReplyDeleteThanks so much for linking to my tutorial! Quite a few people have already popped by to take a look and sign up for the free templates. :)
Sorry you were getting spam comments . And unwelcome comments , I hope they were just nuisance and not unpleasant. I think I'll give one of these cases a go . Looks fun but
ReplyDeleteThat is a sweet little purse. I have one in plastic which is just perfect for my laundry quarters. I,love the KF one the best. A cute little gift. It could hold some wrapped chocolates or a tree ornament at Christmas, or both - we all need choccolate.
ReplyDeleteI've always wondered how those little cases were made! They remind me of frog mouths, opening and closing to catch flies :) I'll file this away in my "special projects" folder for future reference.
ReplyDeleteI'm sorry you're having family health issues. We're at that age, aren't we, where the parents (and aunts and uncles) are getting to need more of our attention. I hope things work out well on that front. No need to worry about responding quickly. We all understand!
A thimble keep! What a clever idea! I've had my thimble for years and years, and am always fearful of losing it. Like you, it's my favorite, and a perfect fit. Thanks for the instructional post, my dear. Hope things have slowed a bit and your family are feeling better. Always such a concern. XO
ReplyDeleteThanks so much for the tutorial and the link for the templates. I think I will make one of these today.
ReplyDeleteWhat a cute little case.
ReplyDeleteThis is a great hand sewing project, and as you said, a great idea for gift giving. Thanks for showing how it is made and the link to the tutorial!
ReplyDeleteKate, I have never seen these little coin purses before. They are really adorable. Thank you for plotting out the steps you took to make yours. I am going to check out the tutorials you linked to as well. I hope your family's health issues have settled down and everyone is feeling better.
ReplyDeleteThis is such a cute little case, perfect for those little notions that tend to get lost so easily in the sewing room.
ReplyDeleteThese are super cute! Well done!
ReplyDeleteCute thimble cases. Gorgeous blocks. Sending good wishes for you and your family's well-being.
ReplyDeleteSo cute and clever! Thank you for sharing the design. Do you really need the inner piece of plastic, wouldn't one layer be enough?
ReplyDeleteWhat a great little container! I've never seen them before! Good luck for tomorrow!
ReplyDeleteVery cute! What did Your Guy decide to do with his? Hope all is well on the health front for the parents.
ReplyDeleteLove your detailed tutorial, Kate. By Nellie, these things are so cute. I am sure they are addictive too. How many have you made? Oh come on, be honest. Now, raise your hand and say - My name is Kate and I am a thimble maker addict.
ReplyDeleteHugs,
Preeti.
These are so cute! I may make one for my son, he'd love a place to keep one of his small toys like a Mickey Mouse figurine.
ReplyDeleteYour gypsy wife blocks look great!